Wireless Network
SHU Wireless Networks
Sacred Heart
Access to the campus Wi-Fi environment is available by connecting to the “Sacred Heart” Wi-Fi network. This is a secure and encrypted Wi-Fi network that utilizes your unique username and password, the same username and password you use to access your Sacred Heart email. Always keep these credentials private and remember to change your password when prompted. Please do this before they expire as it will affect your ability to securely log into the “Sacred Heart” Wi-Fi network. See below for instructions on connecting to the “Sacred Heart” Wi-Fi Network.
SHU-DeviceNet
Purpose: For connecting devices such as Xbox, Playstation, Apple TV, Roku, Smart TVs, Google Chromecast, etc. These devices do not support connecting with the secure and encrypted features of the “Sacred Heart” Wi-Fi network. To connect these devices wirelessly, connect to the “SHU-DeviceNet” Wi-Fi network instead.
SHU-Guest
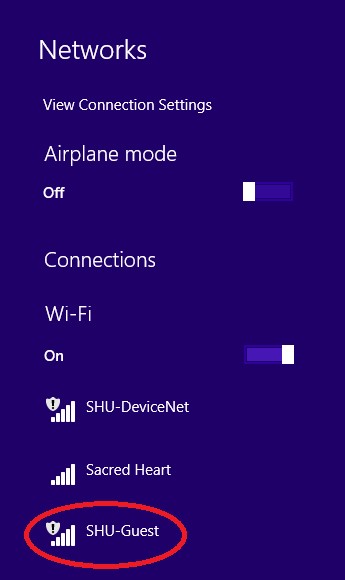
The “SHU-Guest” Wi-Fi network is intended purely for visiting guests of Sacred Heart University and resources are limited. While connected on this network you will only have access to outside Internet and will have limited access to Sacred Heart University resources.
Eduroam
Eduroam (education roaming) is the secure, world-wide roaming access service developed for the international research and education community. Eduroam allows students, researchers and staff from participating institutions to obtain internet connectivity across campus and when visiting other participating institutions by simply opening their laptop and connecting to eduroam.
Technical Support
If you experience difficulties, read through the documentation provided on our website. If you do not have a Sacred Heart account and you are a current Student or Faculty/Staff member, visit the PioTech Center for assistance in creating your account. The PioTech Center is located in the Academic Center or can be reached by calling 203-365-7575.
Connecting to SHU Wi-Fi
Below are instructions to connect to the secure “Sacred Heart” Wi-Fi. The procedure below is only required upon the first time connecting your device to the “Sacred Heart” Wi-Fi network.
For Windows 7/8 & Mac OS X users:
Click the wireless icon in your taskbar and connect to the “Sacred Heart” Wireless Network Connection.
You will be prompted for your Sacred Heart credentials.
The first time you connect it will return a warning. This warning is informing you that your profile for this network is not configured to accept secure certificate authentication. 

Please click “Connect” in Windows or “Continue” in Mac OS X.
This connection is to a secure server located on the Sacred Heart Campus and will allow you to successfully connect to the “Sacred Heart” Wi-Fi network. This procedure is only required upon the first time connecting to the Sacred Heart wireless network.
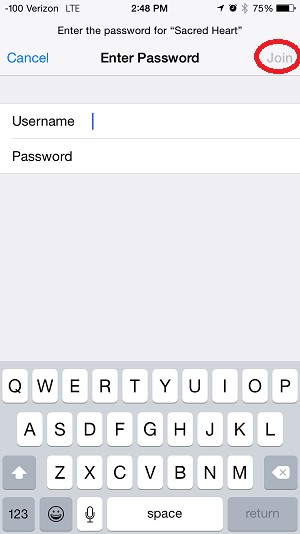
Below are instructions to connect an Apple iPhone, iPad, or iPod to the secure “Sacred Heart” Wi-Fi network. The procedure below is only required upon the first time connecting your device to the “Sacred Heart” Wi-Fi network.
Please note that you will need to enter in your Sacred Heart username and password to join the Sacred Heart Wi-Fi network. Your username is required to securely connect to the Wi-Fi network, and ensures that the connection is secure and private.
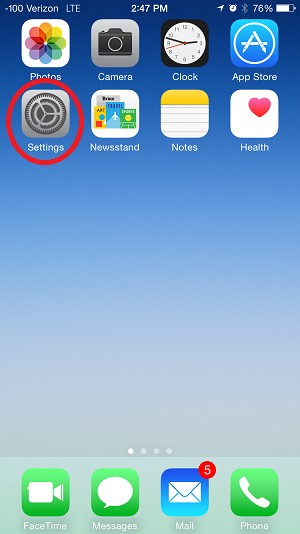
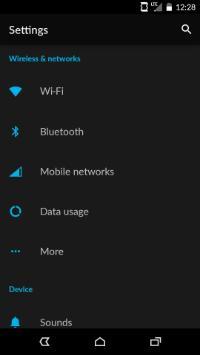
- First, from the home screen of your iPhone, navigate to “Settings”.
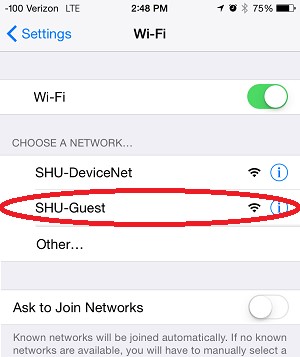
- Select “Wi-Fi”.
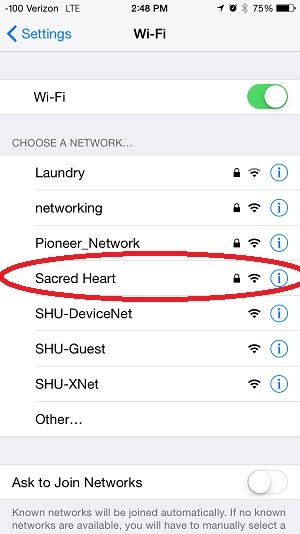
- Ensure that Wi-Fi is turned on at the top of the screen, then select “Sacred Heart”.
- Type in your Sacred Heart username and password. These are the same credentials that you would use to connect to your Sacred Heart email.
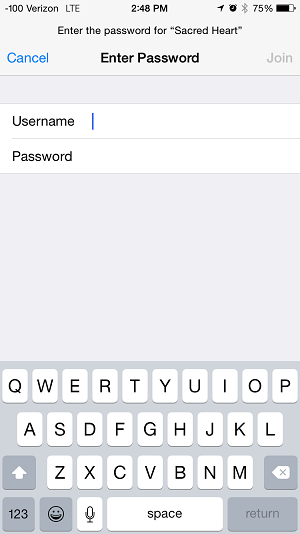
- Select “Join” on the top right of the screen.


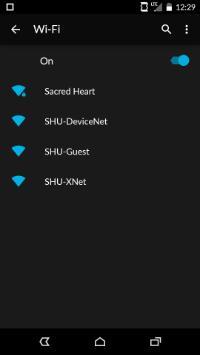
- Go to settings on your android device.
- Under Wireless and Networks, navigate to Wi-Fi.
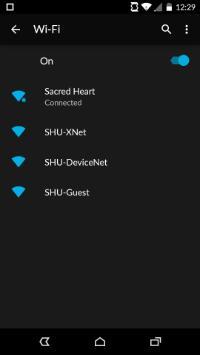
- In this menu all of the available wireless networks will be shown. Tap on Sacred Heart to start the connection.
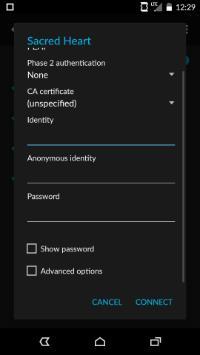
- Enter your Sacred Heart username in the “Identity” field and your Sacred Heart password in the “Password” field. Leave Anonymous Identity blank.

- Hit connect and it will authenticate you to the Sacred Heart Wireless network. You are now connected to the internet.


While on campus you will need to register the MAC address of the device at this web site: mydevices.sacredheart.edu. If you are unsure of how to find your device’s MAC address, please refer to the instruction manual or look below for instructions for a particular device. The format for a MAC address is: 01:23:45:67:89:ab. Once registered, the device will have access to the “SHU-DeviceNet” Wi-Fi network. Please keep in mind that devices that have the ability to connect to the “Sacred Heart” Wi-Fi network should do so.
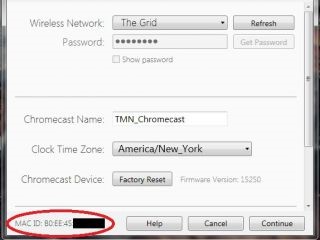
- Open the Google Home app.
- Tap your Chromecast device.
- Tap Settings
- Scroll down to Information and find your MAC address.
- From a web browser visit mydevices.sacredheart.edu and login with your SHU username and password.
- Click “Add”.
- Under “Device name” please define the type of device that you are connecting.
- Enter the Wi-Fi/MAC address in the MAC address field.
- Click “Submit”.
- Restart your Google Chromecast.
- Connect to the “SHU-DeviceNet” Wi-Fi network.
- Your device should now be connected to the Internet.
- On your phone or tablet, have the Chromecast join the wireless network and enter the wireless password as needed.
- Rejoin your phone or tablet to the wireless network. You are now read to use your Chromecast

- Select Wii options from the main menu.
- Select Wii Settings and scroll over to Internet.
- Select Console Information.
- The Wi-Fi/MAC address will be listed in the format 01:23:45:67:89:ab
- From a web browser visit mydevices.sacredheart.edu and login with your SHU username and password.
- Click “Add”.
- Under “Device name” please define the type of device that you are connecting.
- Enter the Wi-Fi/MAC address in the MAC address field.
- Click “Submit”.
- Restart your Nintendo Wii.
- Connect to the “SHU-DeviceNet” Wi-Fi network.
- Your device should now be connected to the Internet.
- From the Wii Channel menu, select Wii Settings (the round button on the bottom-left of the screen with Wii on it).
- Select Internet, then Console Settings
- The MAC address of the Wii console is displayed on the first line.

- From a web browser visit mydevices.sacredheart.edu and login with your SHU username and password.
- Click “Add”.
- Under “Device name” please define the type of device that you are connecting.
- Enter the Wi-Fi/MAC address in the MAC address field.
- Click “Submit”.
- Restart your Nintendo Wii.
- Connect to the “SHU-DeviceNet” Wi-Fi network.
- Your device should now be connected to the Internet.

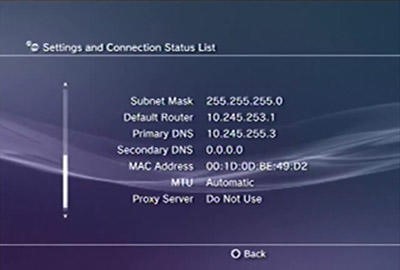
- Select Settings on the PS3 Home Menu.
- Navigate down and select [System Settings]
- Select [System information]. Here you will find your MAC address. Be sure to note down the entire code, including colons.
- From a web browser visit mydevices.sacredheart.edu and login with your SHU username and password.
- Click “Add”.
- Under “Device name” please define the type of device that you are connecting.
- Enter the Wi-Fi/MAC address in the MAC address field.
- Click “Submit”.
- Restart your PS3.
- Connect to the “SHU-DeviceNet” Wi-Fi network.
- Your device should now be connected to the Internet.

- Navigate to the Settings icon located on the far left.
- Select the System icon under the Settings menu. You will see your MAC address listed on this screen, containing letters and numbers in the format xx.xx.xx.xx.xx.xx. Write down your MAC address (LAN Cable)

- From a web browser visit mydevices.sacredheart.edu and login with your SHU username and password.
- Click “Add”.
- Under “Device name” please define the type of device that you are connecting.
- Enter the Wi-Fi/MAC address in the MAC address field.
- Click “Submit”.
- Restart your PS4.
- Connect to the “SHU-DeviceNet” Wi-Fi network.
- Your device should now be connected to the Internet.

- From the home screen, select Settings.
- Select About.
- The Wireless MAC Address will be displayed on the screen. If you use a wired connection, you'll be interested in the Ethernet MAC address.

- From a web browser visit mydevices.sacredheart.edu and login with your SHU username and password.
- Click “Add”.
- Under “Device name” please define the type of device that you are connecting.
- Enter the Wi-Fi/MAC address in the MAC address field.
- Click “Submit”.
- Restart your Roku (Unplug the power cord and then plug back in).
- Connect to the “SHU-DeviceNet” Wi-Fi network.
- Your device should now be connected to the Internet.

- Go to the main menu on your Apple TV device and select Settings.
- Select About from the menu for the network information
- Here you can find your MAC address listed as either the Wireless or Ethernet (depending on the connection you are using).

- From a web browser visit mydevices.sacredheart.edu and login with your SHU username and password.
- Click “Add”.
- Under “Device name” please define the type of device that you are connecting.
- Enter the Wi-Fi/MAC address in the MAC address field.
- Click “Submit”.
- Restart your Apple TV (Unplug the power cord and then plug back in).
- Enter the Wi-Fi/Mac address in the MAC address field.
- Connect to the “SHU-DeviceNet” Wi-Fi network.
- Your device should now be connected to the Internet.

- Go to the System area of the Xbox Dashboard and select Network Settings.
- Select Edit Settings.
- From Additional Settings, select Advanced Settings.
- At the bottom of this screen you'll see a heading called Wired MAC Address.

- From a web browser visit mydevices.sacredheart.edu and login with your SHU username and password.
- Click “Add”.
- Under “Device name” please define the type of device that you are connecting.
- Enter the Wi-Fi/MAC address in the MAC address field.
- Click “Submit”.
- Restart your Xbox 360.
- Connect to the “SHU-DeviceNet” Wi-Fi network.
- Your device should now be connected to the Internet.

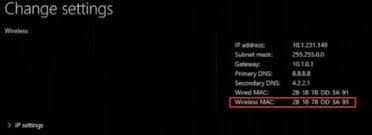
- Go to My Xbox One in the Xbox Dashboard and select Settings.
- In the Settings pane, select Network
- Select Advanced Settings from the Network Settings tab.
- At the bottom of this screen you'll see headings for Wired MAC and Wireless MAC.
- From a web browser visit mydevices.sacredheart.edu and login with your SHU username and password.
- Click “Add”.
- Under “Device name” please define the type of device that you are connecting.
- Enter the Wi-Fi/MAC address in the MAC address field.
- Click “Submit”.
- Restart your Xbox One.
- Connect to the “SHU-DeviceNet” Wi-Fi network.
- Your device should now be connected to the Internet.

For Windows 7/8 & Mac OS X users:
- Click the wireless icon in your taskbar and connect to the “SHU-Guest” Wi-Fi network connection.
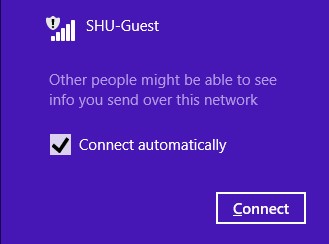
- Please click “Connect” in Windows.
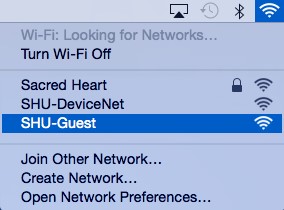
- In Mac OS X click on “SHU-Guest” under the list of Wi-Fi networks.
- You may also connect to the “SHU-Guest” Wi-Fi Network using your Apple and Android devices. First, connect to the “SHU-Guest” Wi-Fi Network and a browser window will open automatically.
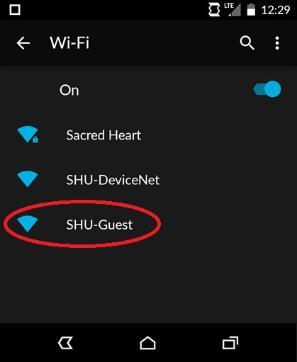
- Upon connecting to “SHU-Guest”, a browser window will open automatically

- You will have an option of logging in with a previously created guest account, or to create a new guest account. Please read the terms and conditions before continuing. You will need to select “I agree” before proceeding.If you do not have a guest account, please click “Create a Guest Account” at the bottom of the page.

- Please type your name, email address, phone number. You may also (optionally) provide a reason for your visit to the SHU Campus.Upon clicking “Submit”, you will receive your temporary SHU Guest account information sent to you via email and text message. Please note: In order to send your SHU Guest account information to you via text message, your phone number must include a “1” before the area code.

- You will receive a message with your temporary guest account credentials.

- Click “Proceed to Login” You will be asked if you would (optionally) like to register an additional device to connect to the “SHU-Guest” Wi-Fi network. If you do not have any additional devices, select “No, skip registration”.

- You can add additional devices to the “SHU-Guest” Wi-Fi network by entering device’s MAC Address into the “Device ID” field, along with a description for the device in the “Device Description” field. Then, click “Add”. When you are finished, click “Continue”.
- Congratulations! You have successfully connected to the “SHU-Guest” Wi-Fi network. You now have access to the internet, and you may close this window.


Campus Wi-Fi Network Policies
Personal Wireless Networks
Students, Faculty, and Staff members are not permitted to setup or use their own wireless networks on campus. This includes the setup and use of wireless routers, wireless printers, access points, and AD-HOC networks. Please note that wireless printers may only be used after disabling the built-in wireless features, and instead using a USB cable to connect to a computer.
The restriction of such wireless devices is due to the limited wireless spectrum on frequencies used for Wi-Fi. The access points at Sacred Heart University communicate with each other in a way which actively avoids interfering with each other. The design and placement of the access points ensure seamless wireless coverage throughout all Sacred Heart University campuses. When non-Sacred Heart University wireless networks transmit at the same time, it will severely degrade and/or interrupt network connectivity for every user in the area.